Adding Features to Map
Step 1: Navigate to Builder
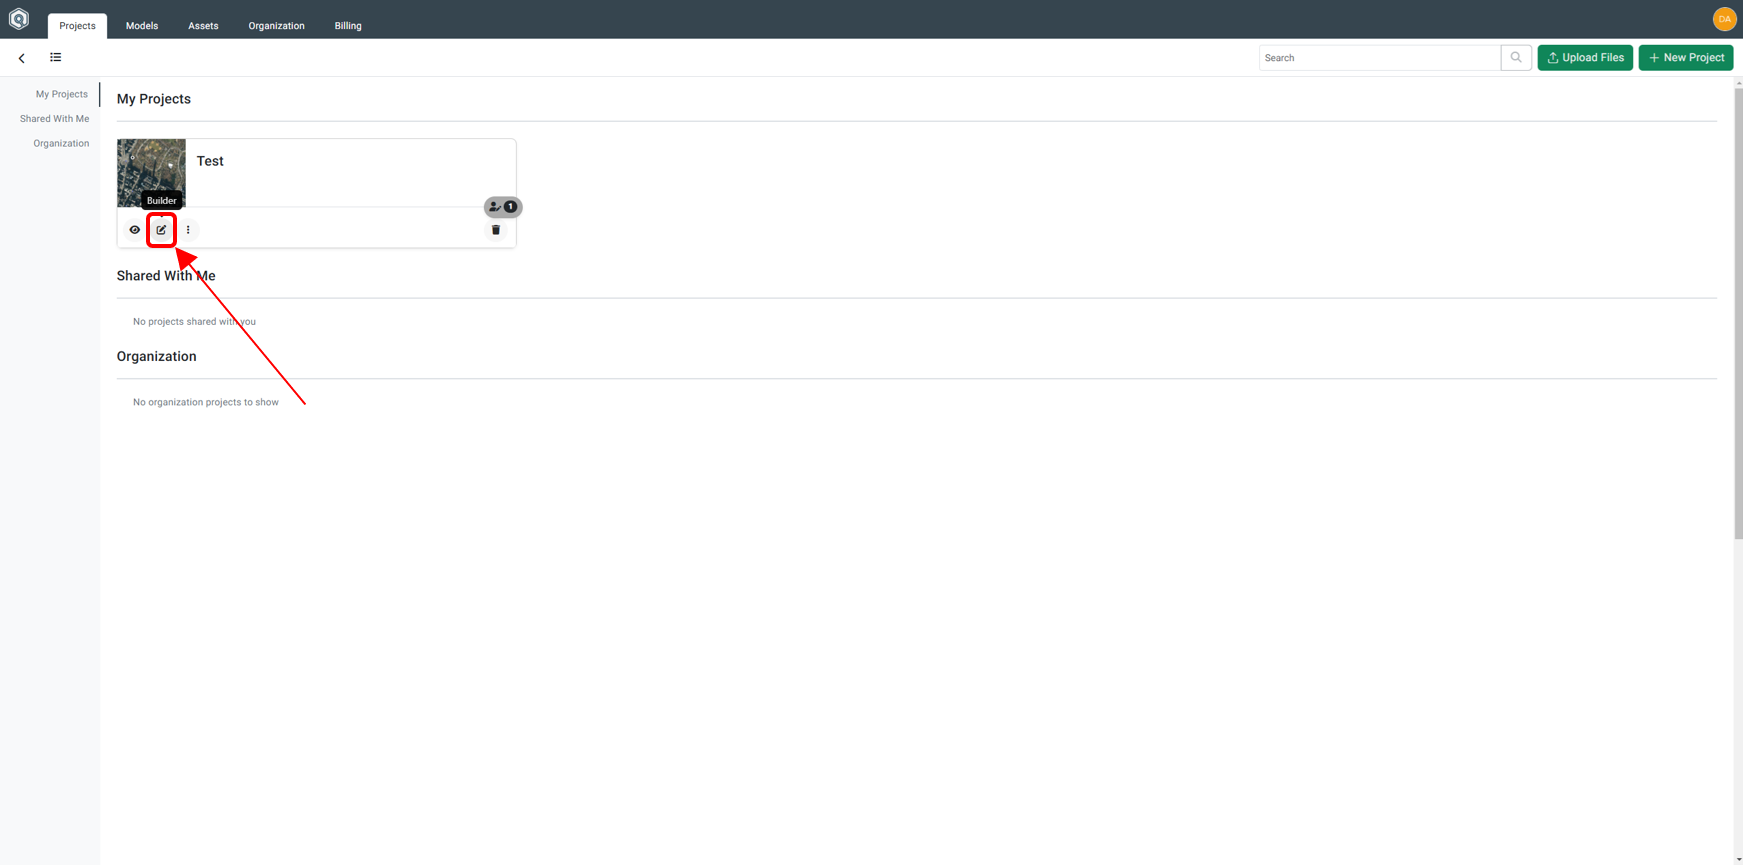
In the project dashboard, navigate to the Builder by clicking on the pencil icon below the project tile.
Step 2: Open Features Tab
The Builder will open the default scene. To add Features to the map, click the Features tab on the left panel.

Step 3: Add a New Feature
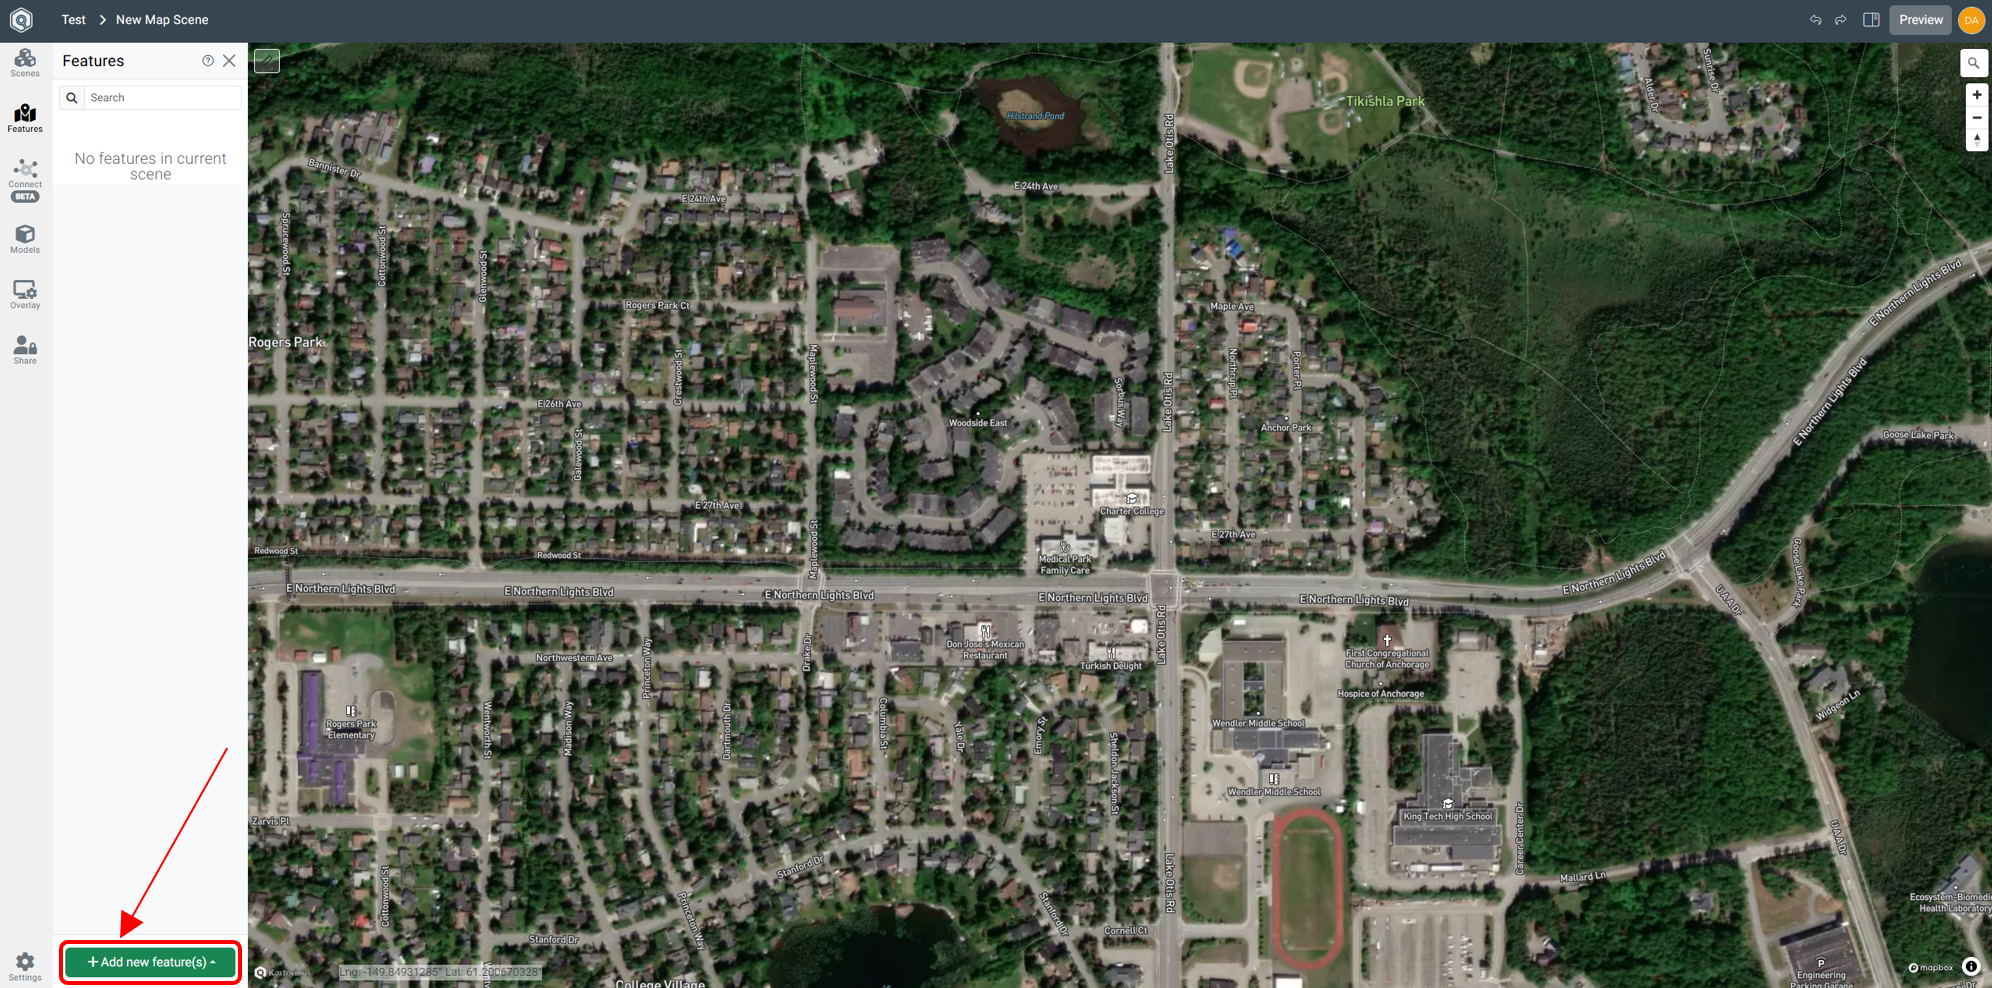
After opening the Features tab, the map scene will initially be empty. Click the + Add new feature(s) button at the bottom of the panel.
Step 4: Select a Feature Type
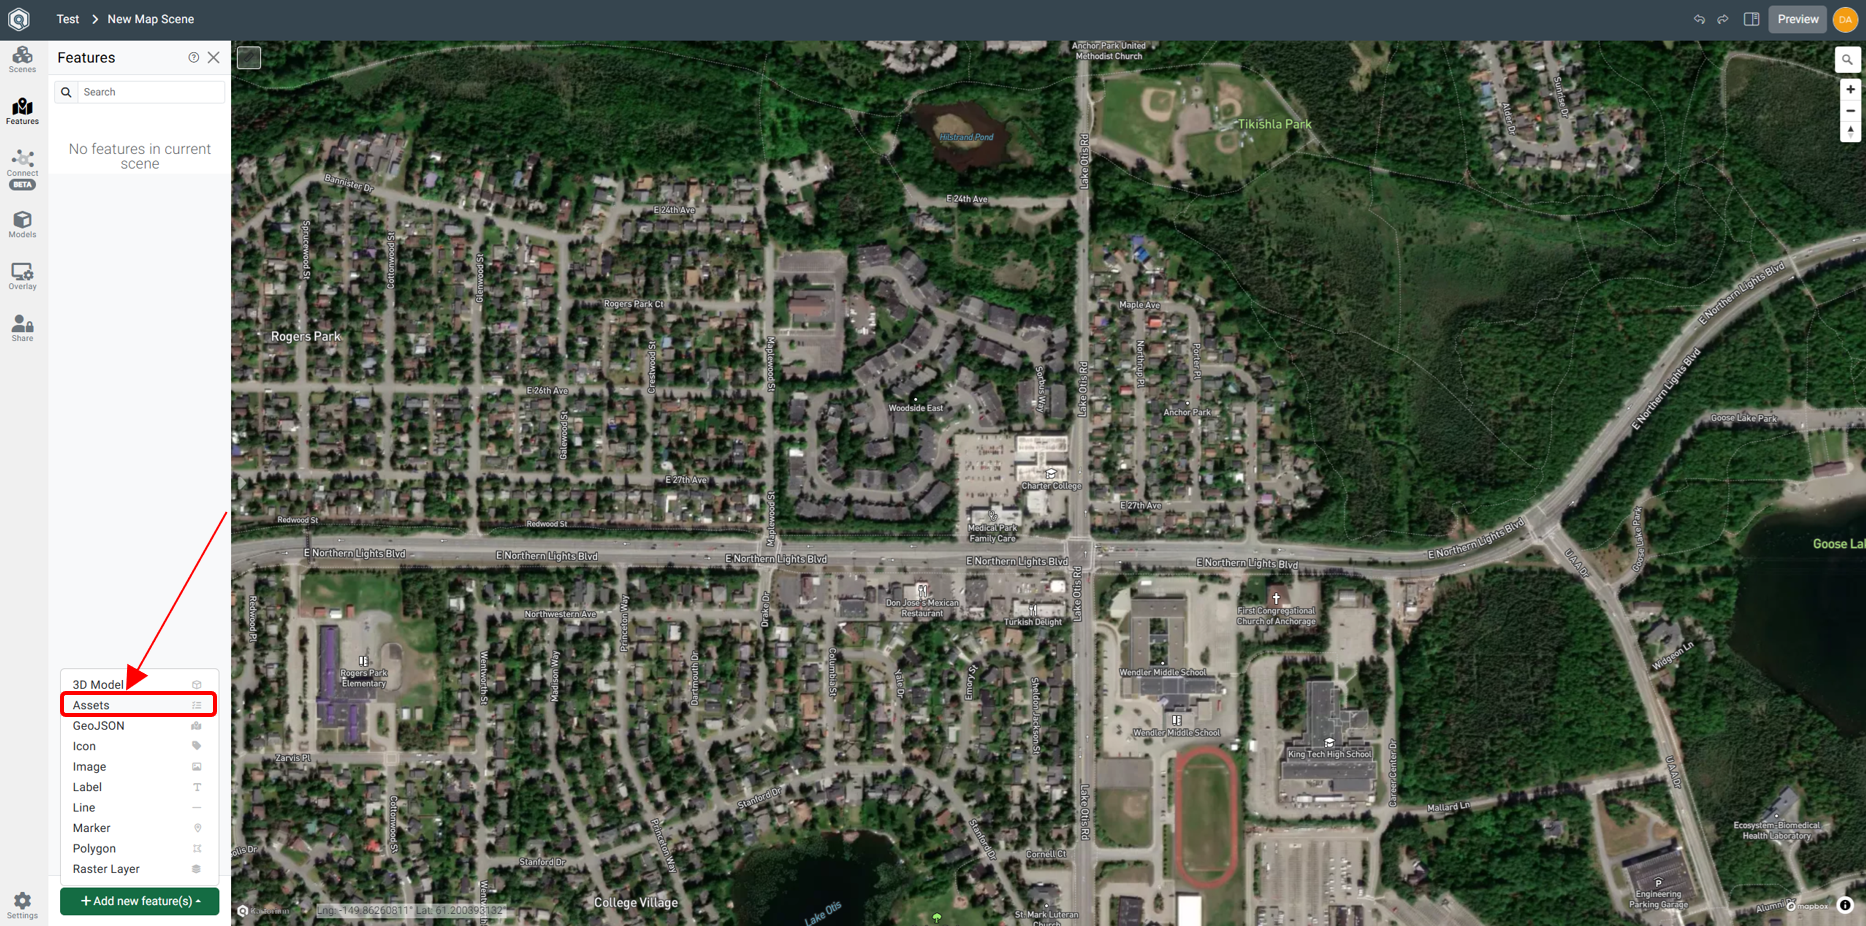
A menu of features will appear. Select Assets to add features to the map.
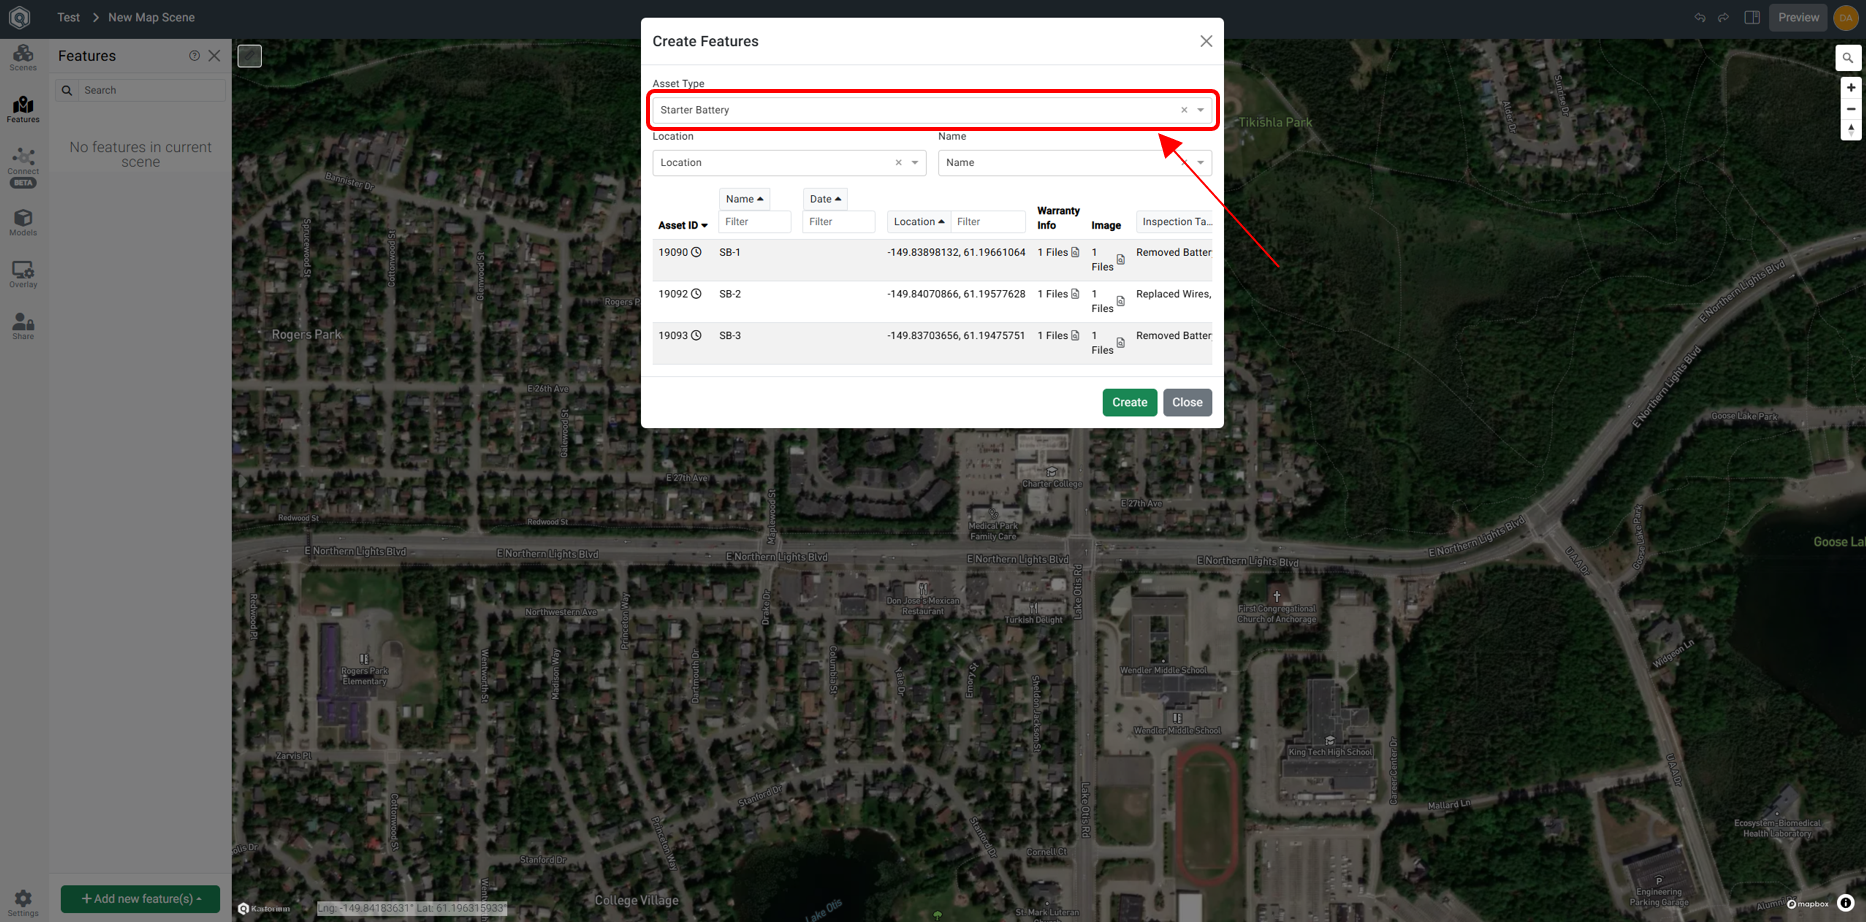
Step 5: Configure Feature Details
The Create Features Dialog Box opens. There are three dropdowns to configure:
- Asset Type - Locate the asset to be created as a feature in the map.
- Location Field - Select which field contains the spatial data.
- Name Field - Select which field contains the asset’s name.
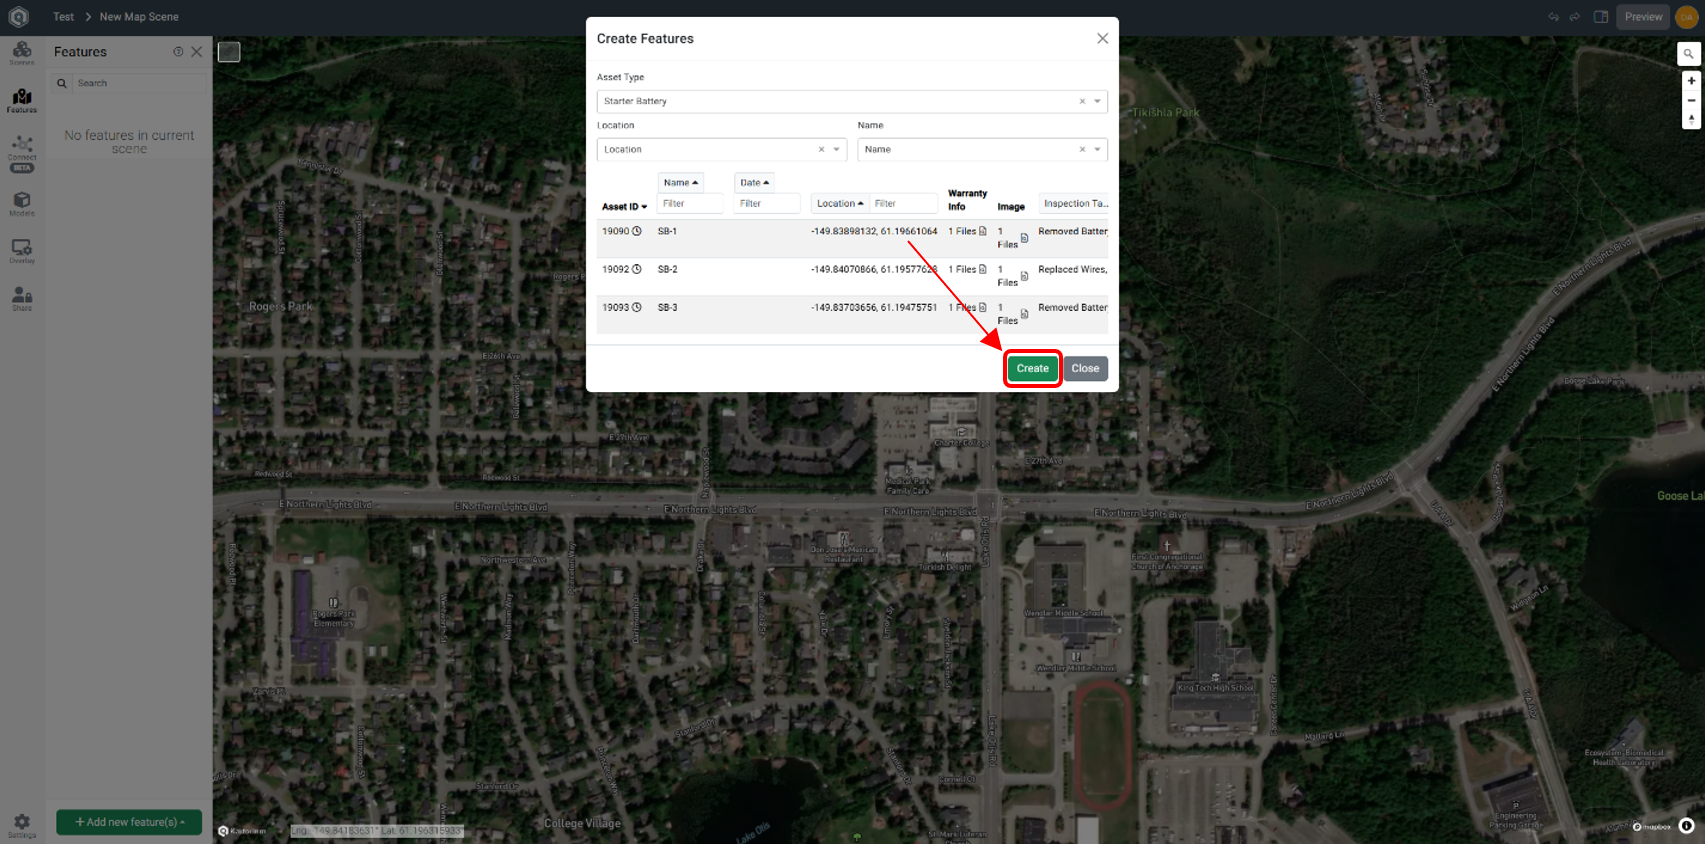
Step 6: Create the Features
Click the Create button at the bottom right of the dialog box. This will add all selected entries to the map as features.
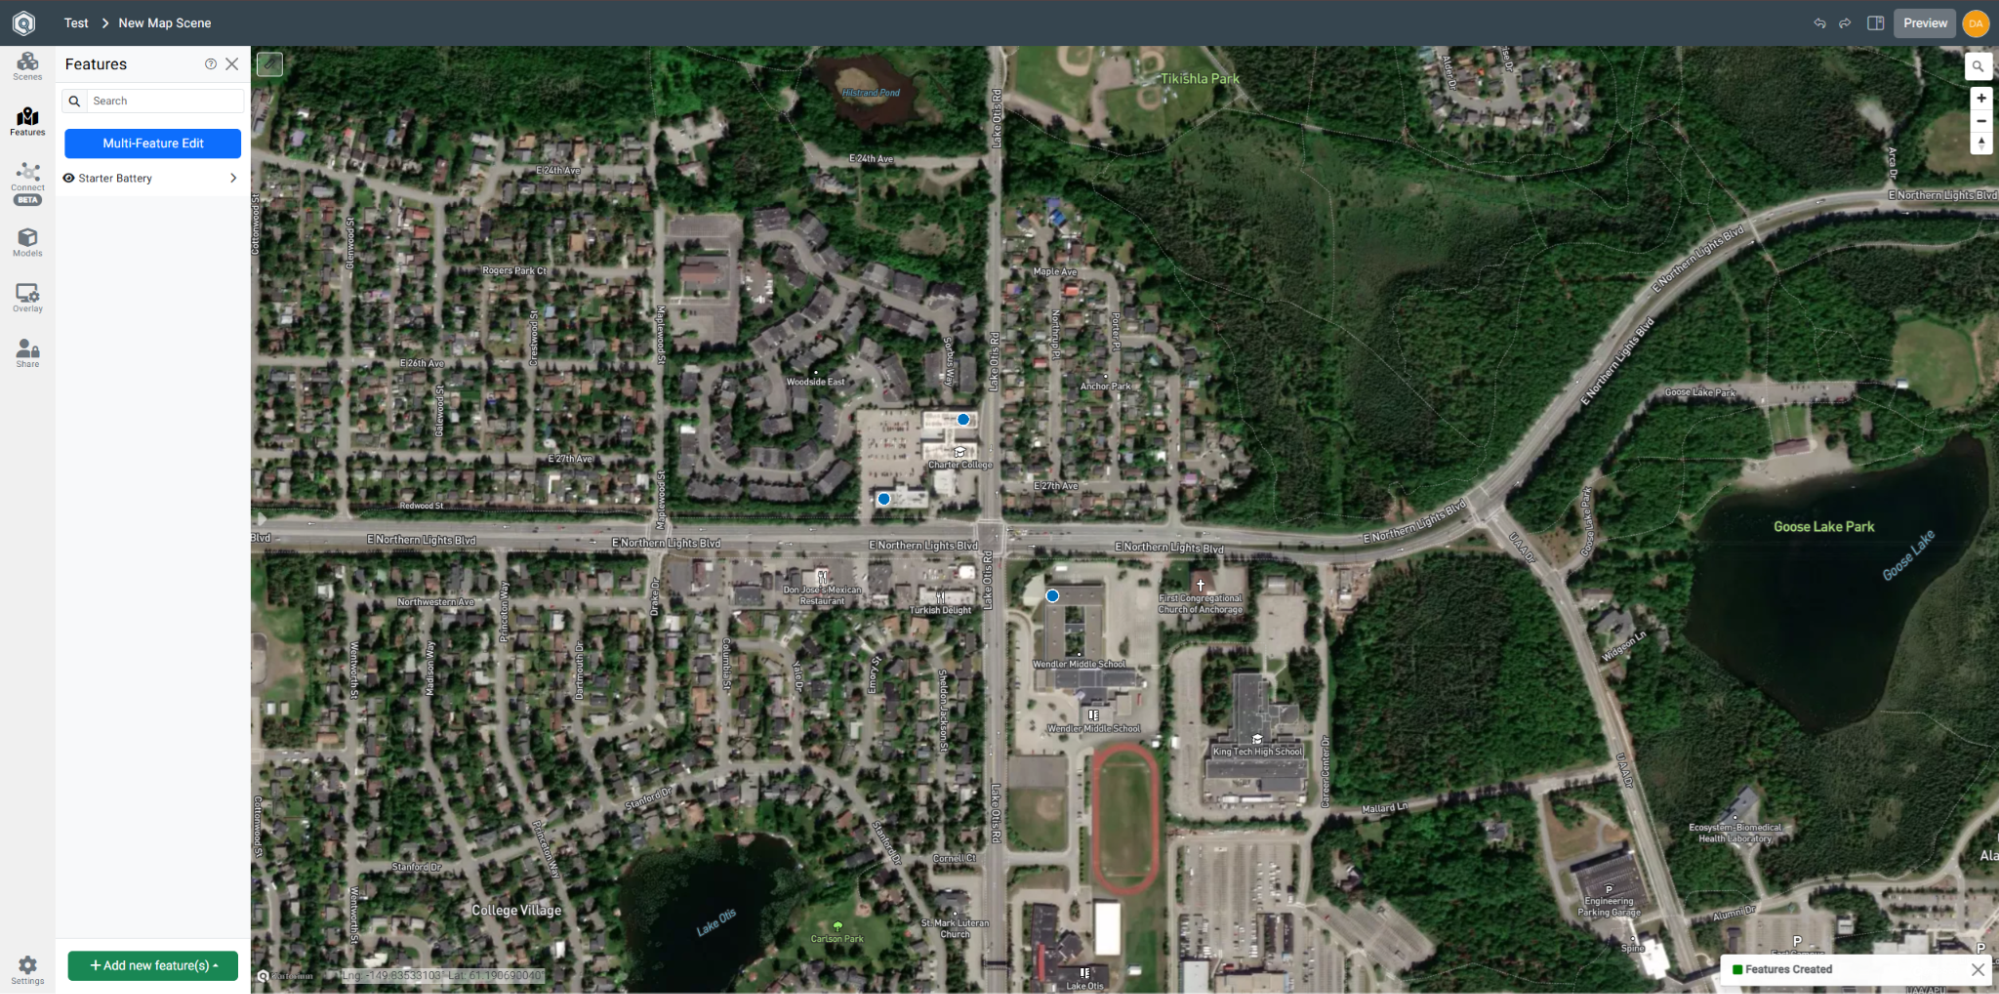
Step 7: View Features in Map Scene
The features have been successfully added to the map and are associated with their corresponding asset entries.
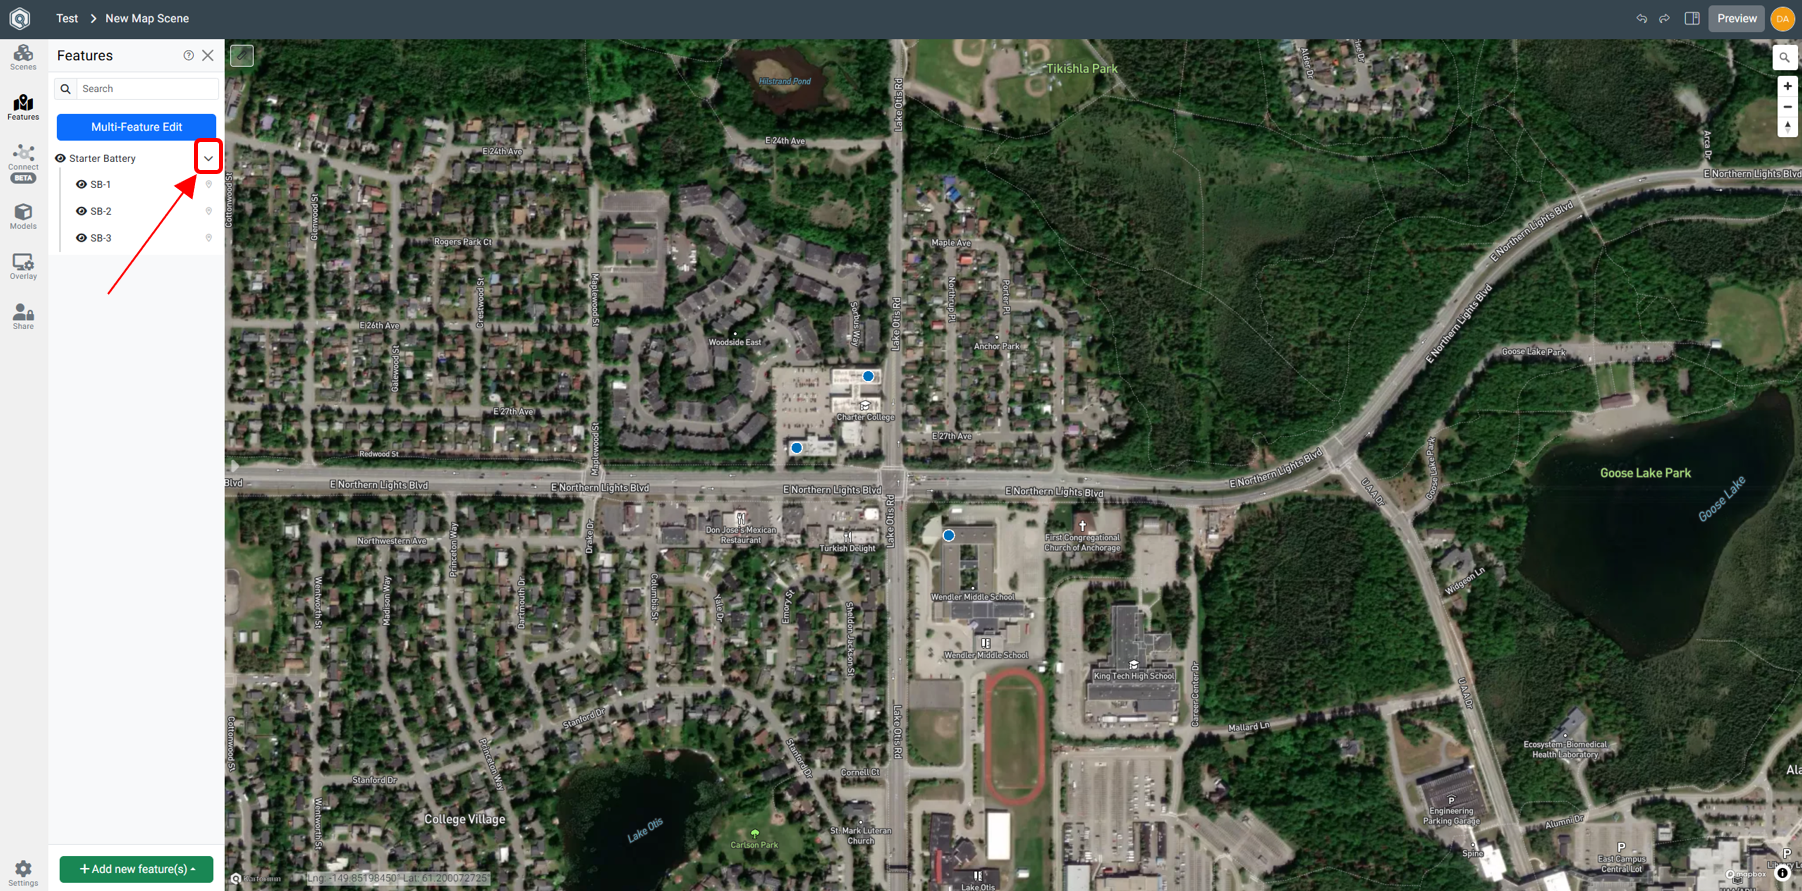
Step 8: Verify Feature Association
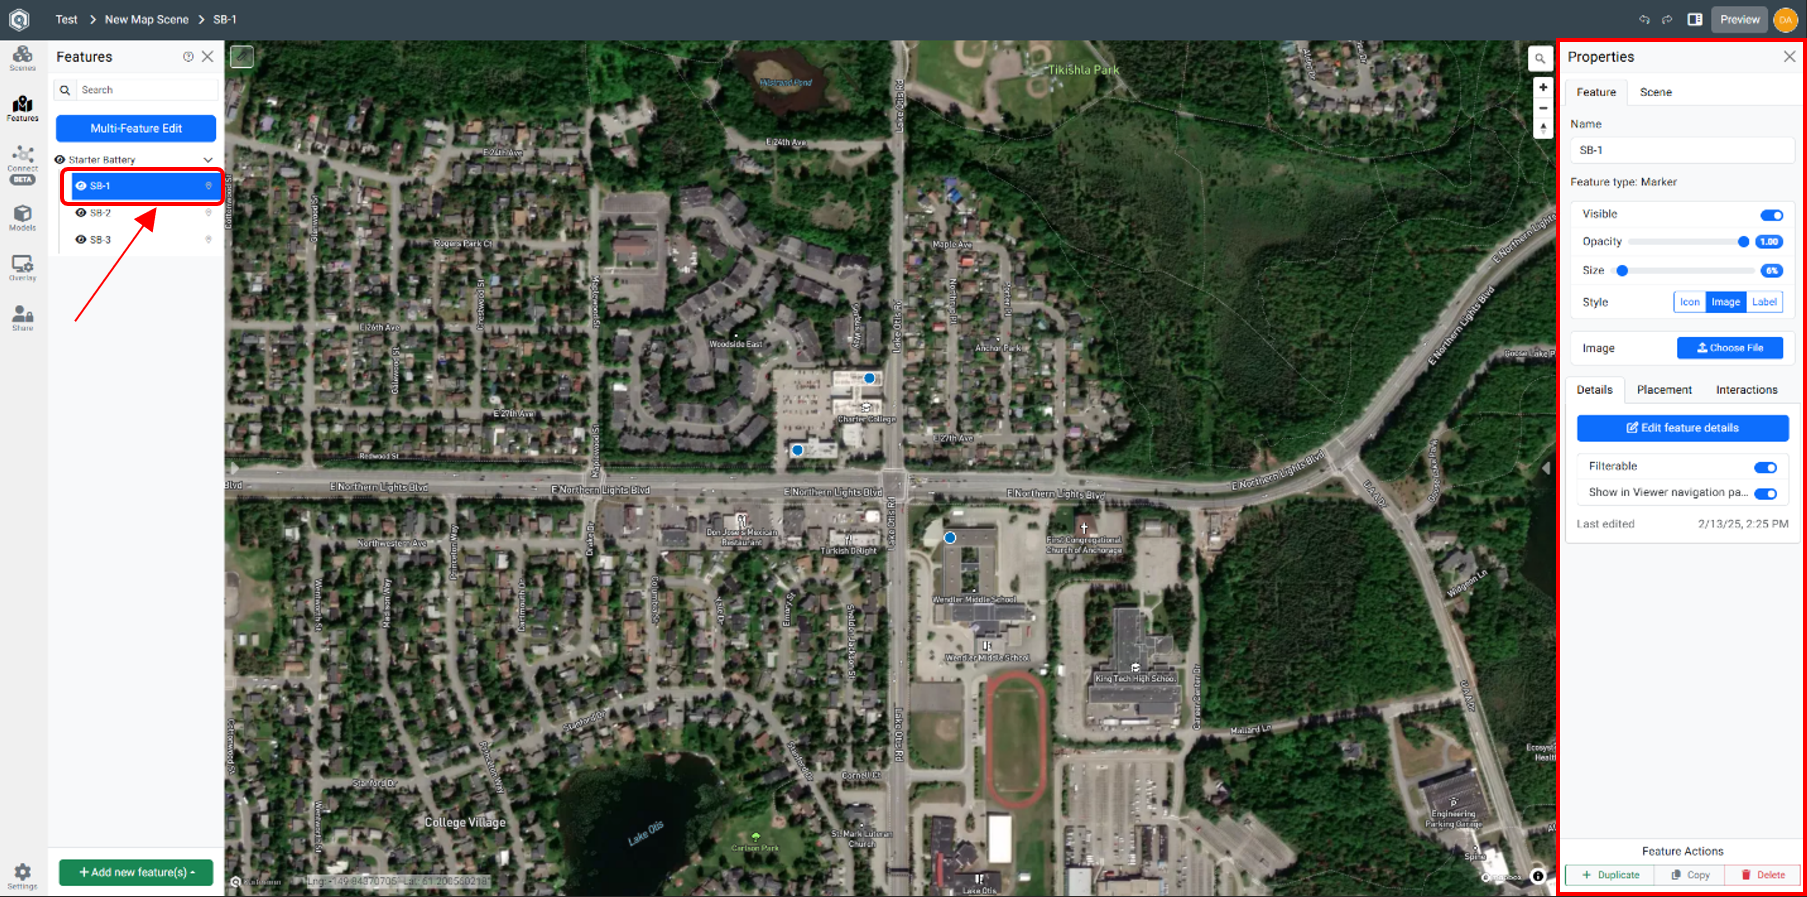
To ensure that the features are correctly associated with asset entries, click the carrot dropdown next to the feature group in the Features panel.
Step 9: Review Feature Properties
Click on an individual feature to open the Properties panel. This panel allows editing and reviewing feature details.
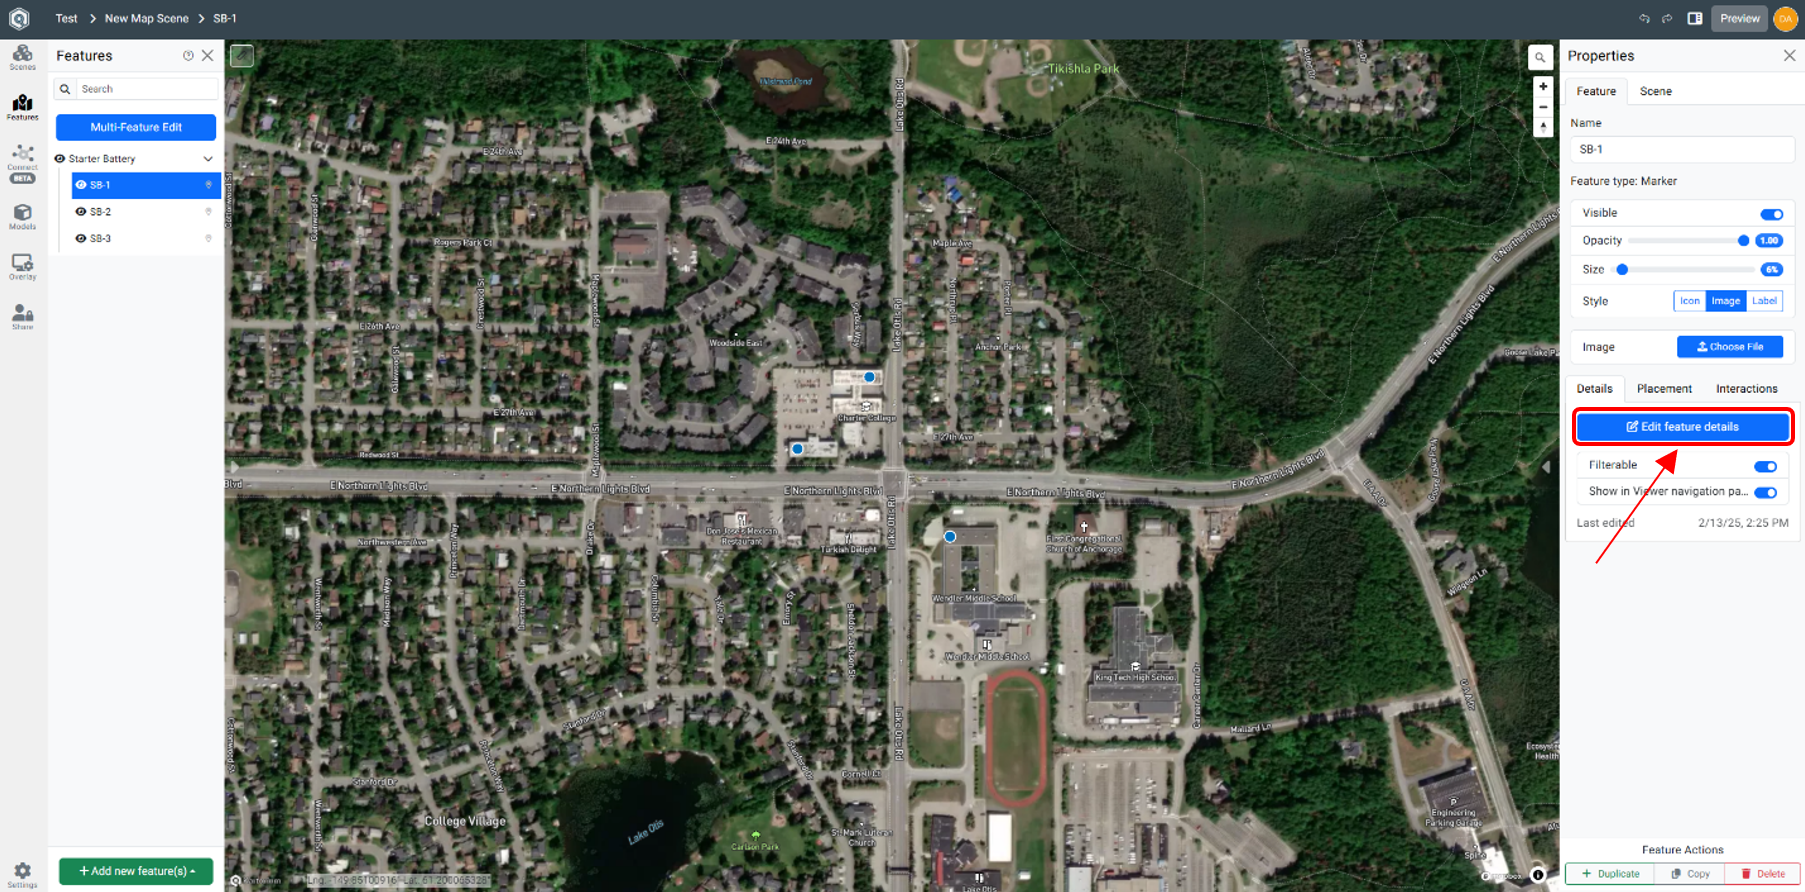
Step 10: Edit Feature Details
Inside the Properties panel, click the Edit feature details button.
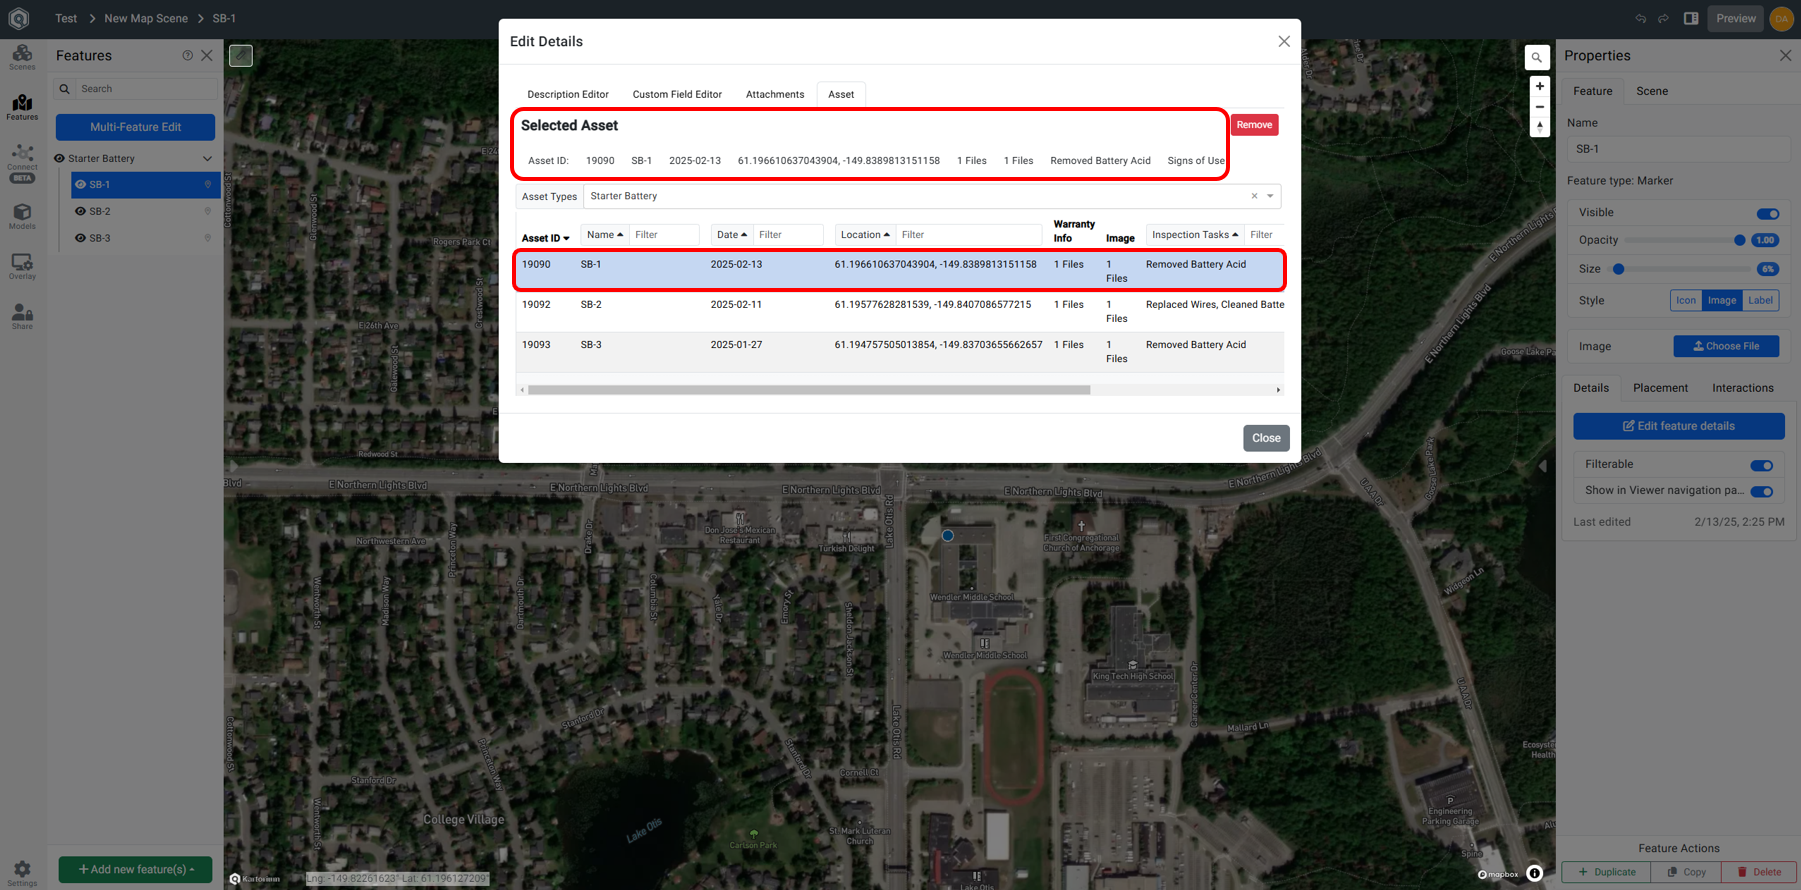
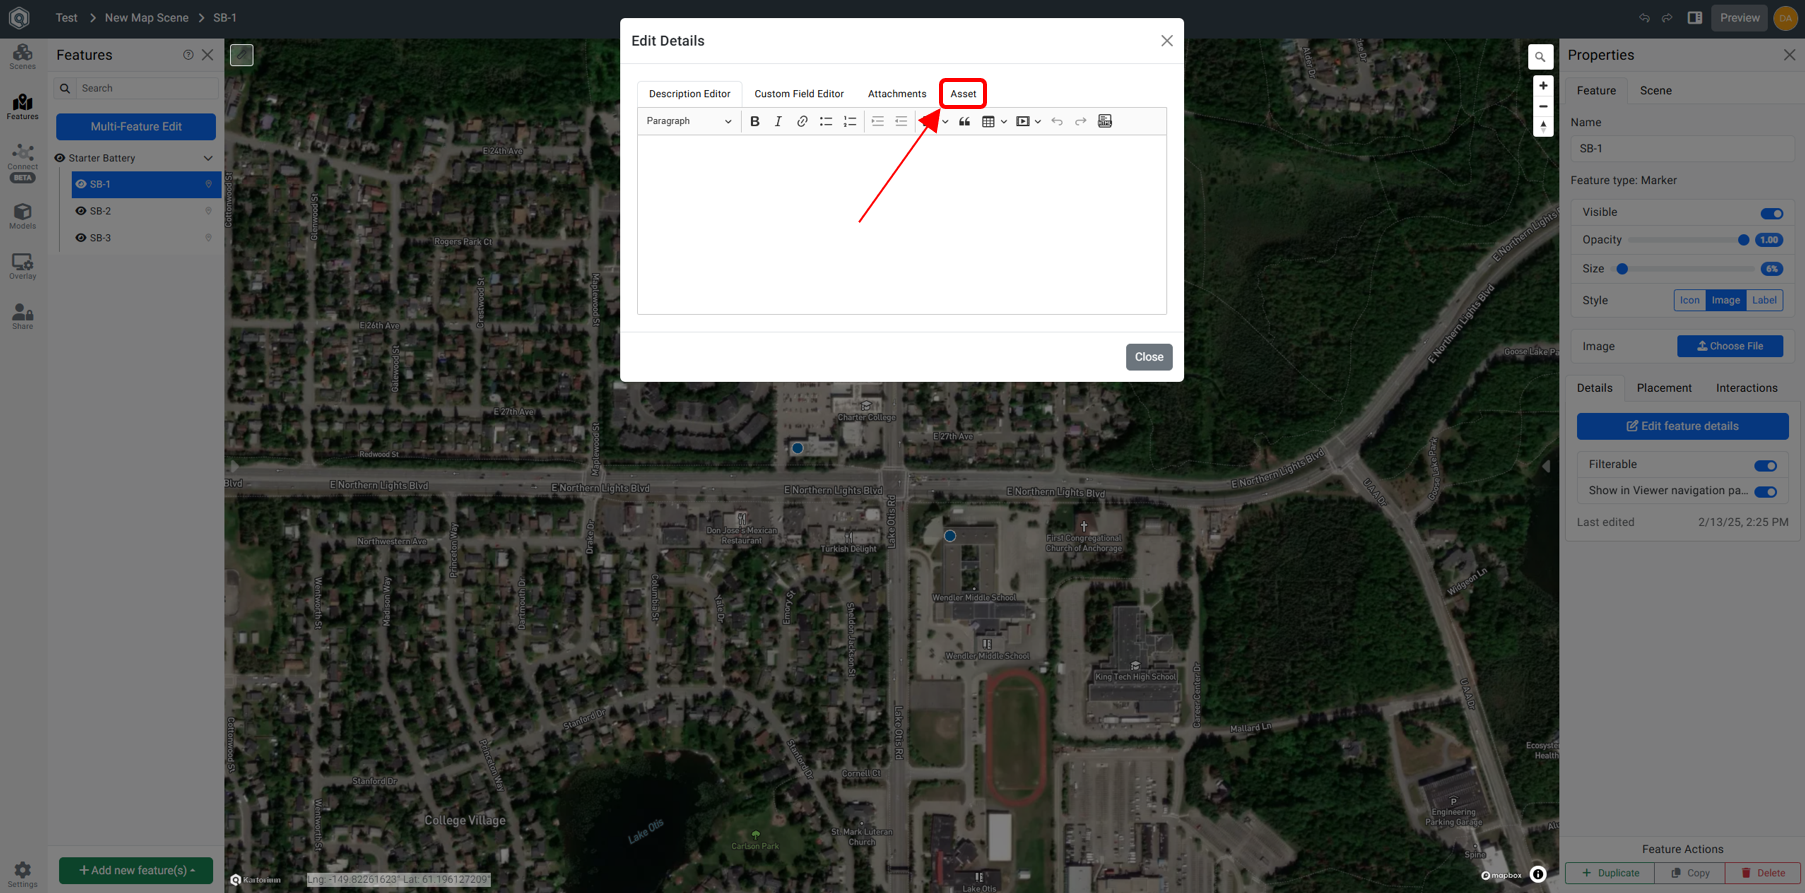
Step 11: Check the Asset Association
The Edit Details Dialog Box opens. Click on the Asset tab to verify the feature’s connection to its corresponding asset in the Asset Manager.
Step 12: Confirm Feature Details
The Selected Asset section at the top of the Edit Details Dialog Box displays the specific asset entry associated with the feature.